Selecting your medical images/files for upload
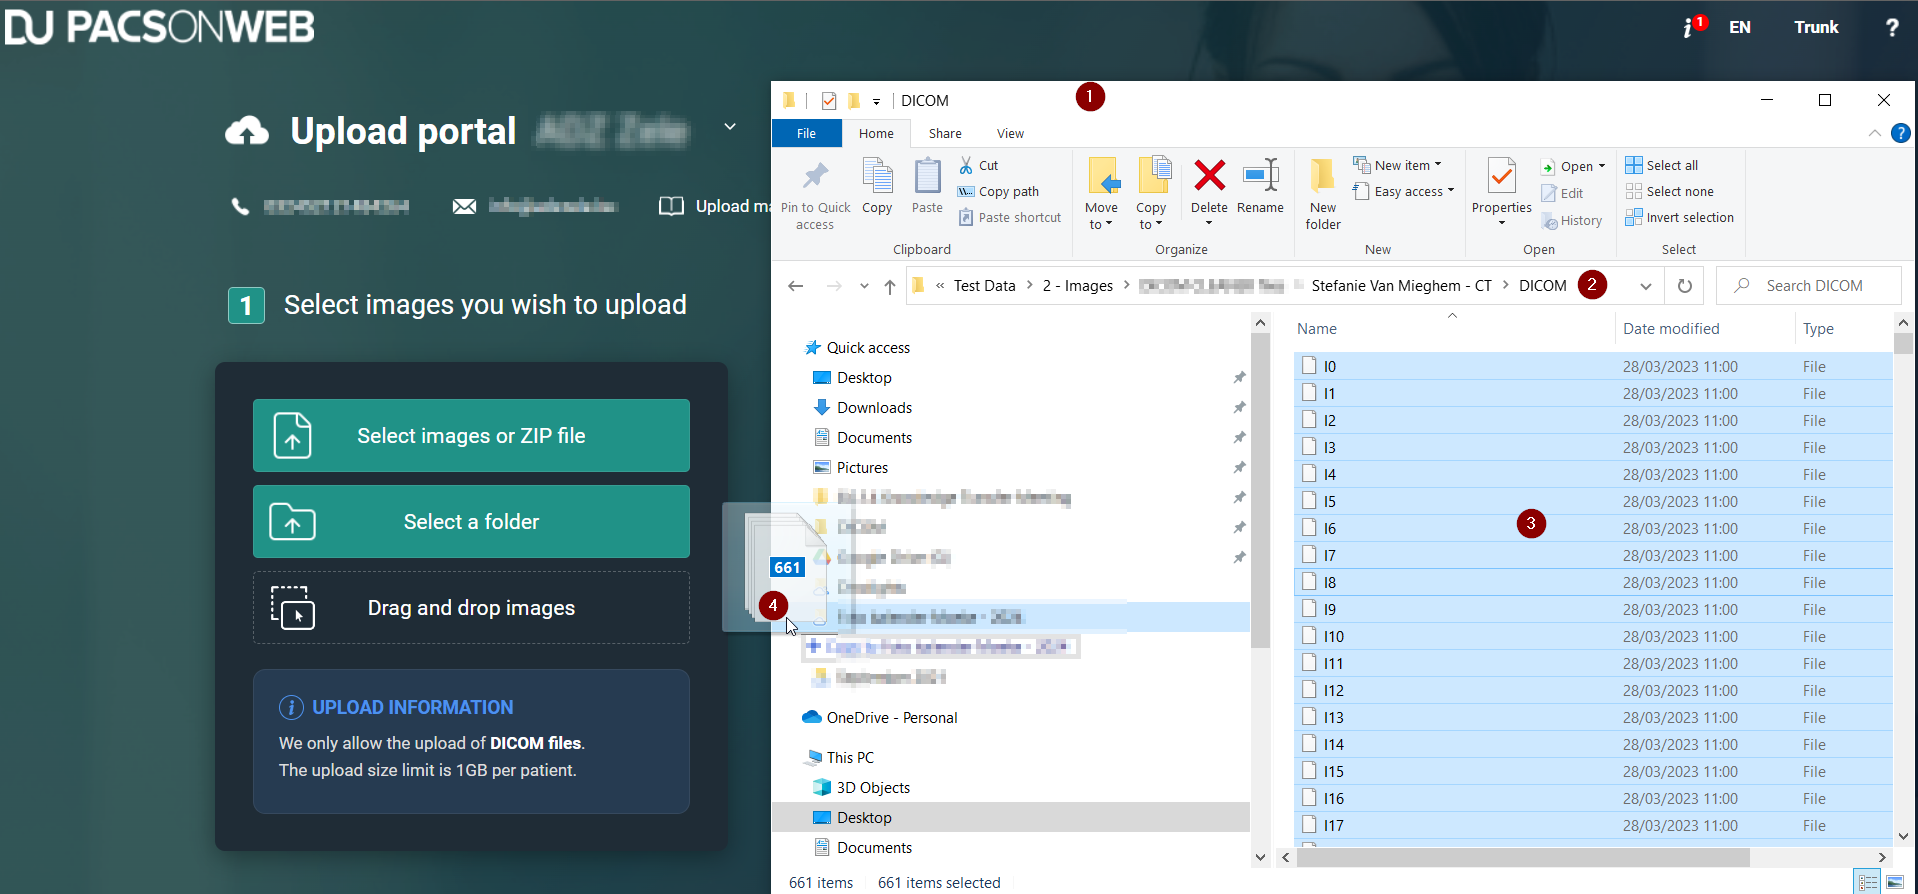
The first step of uploading your images/files to the Upload portal is to select the images/files you wish to upload. There are 3 ways to add your medical images and related documents to the Upload portal.
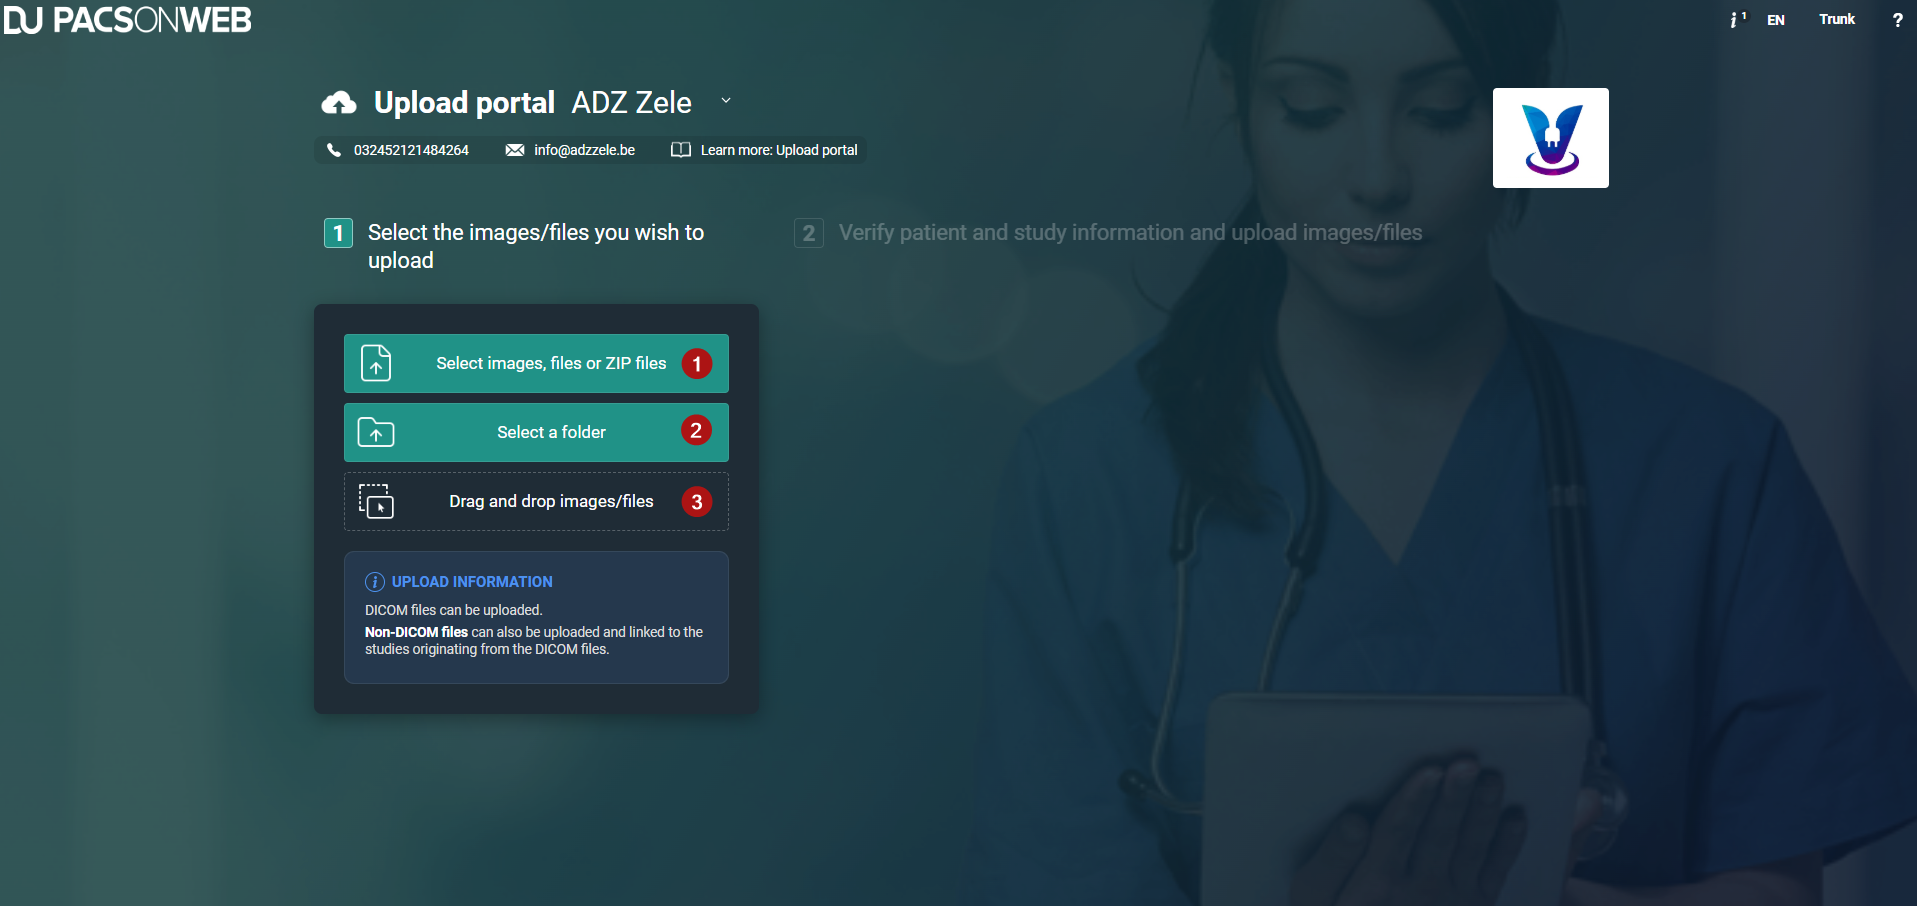
Number | Designation | Description |
|---|---|---|
1 | Select images/files or ZIP files | Use this button to select an image or multiple images, files, or ZIP files. |
2 | Select a folder | Use this button to select an entire folder. |
3 | Drag and drop images/files | Use this drag & drop option to drag and drop selected images or files from a file manager to the Upload Portal. |
 | Note: If your selected images, files, or ZIP files contain a supported non-DICOM file (pdf, png, jpg, jpeg and tif), it will be uploaded and added to that study. |
Selecting images/files or ZIP files
You can use the Select images, files or ZIP files button to add your medical images and related documents. You can upload multiple images or files at once or select a ZIP file to upload.
Selecting multiple images
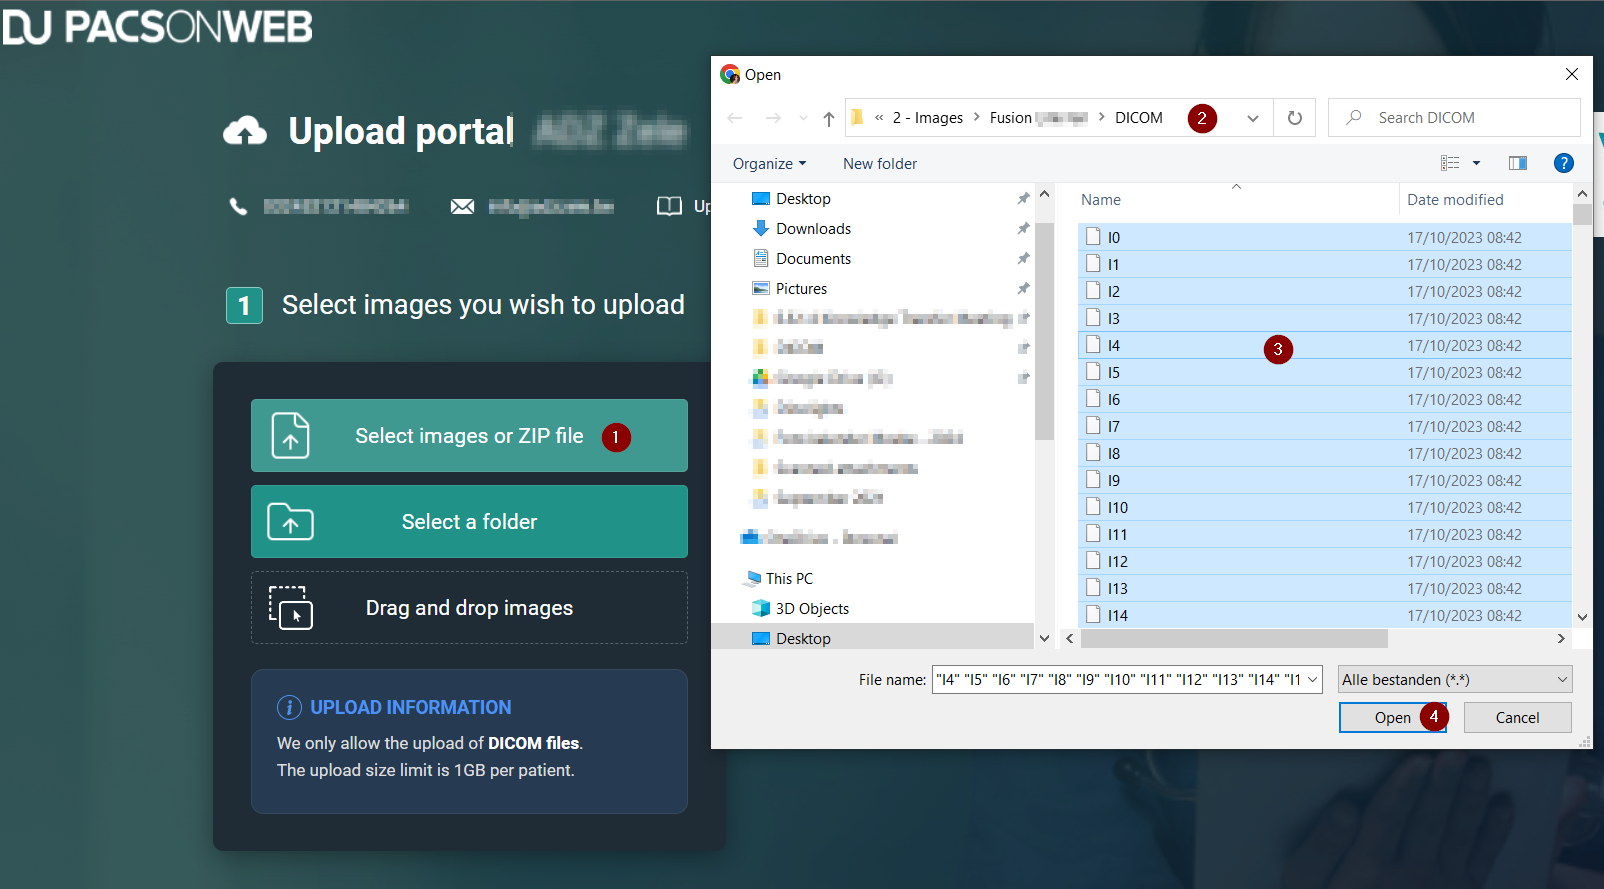
1. Click on the button Select images, files or ZIP file.
2. In the file manager, navigate to the folder where your image/files are located.
3. In the folder, select all files.
 | Tip: You can select all files by selecting one file and pressing Ctrl + A or by selecting the first file in the folder, scrolling down to the end of the files, pressing SHIFT + left mouse, and clicking on the last file. |
4. Click on the Open button in the file manager.
The selected images/files will be added to the upload portal and ready for verification and upload.
Selecting a ZIP file
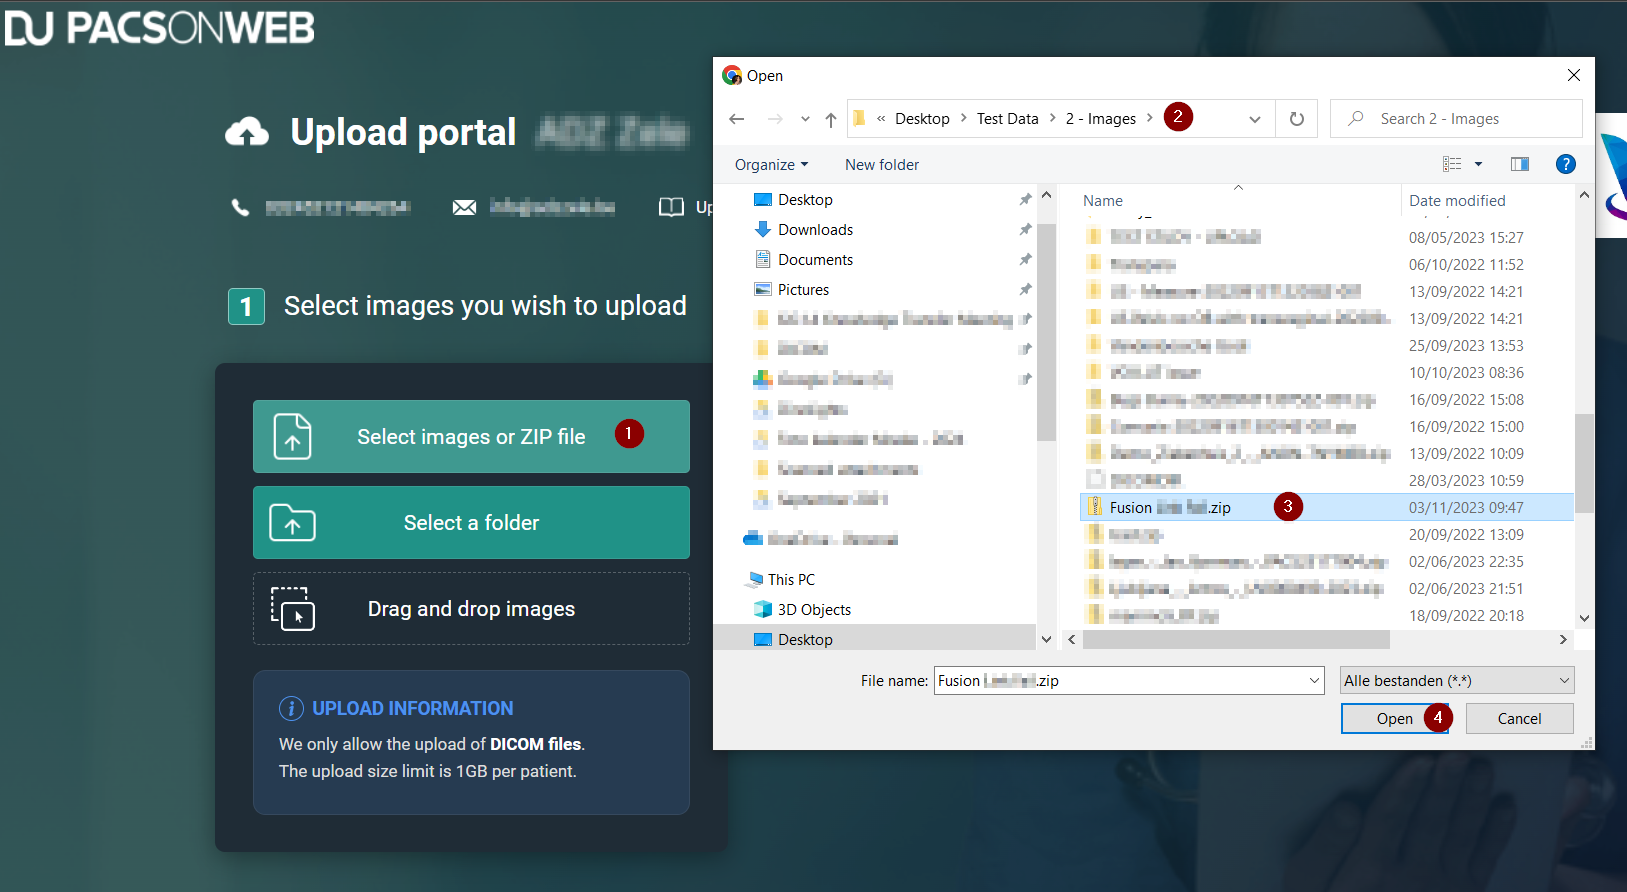
1. Click on the button Select images or ZIP file.
2. In the pop-up dialog, navigate to the ZIP file that contains your images.
3. Select the ZIP file.
4. Click on the Open button in the pop-up dialog.
The images/files within the ZIP file will be added to the upload portal. To complete the upload, verify the information and click Start upload.
Selecting a folder or CD/DVD
You can use the Select a folder button to add an entire folder that contains your medical images and related documents.
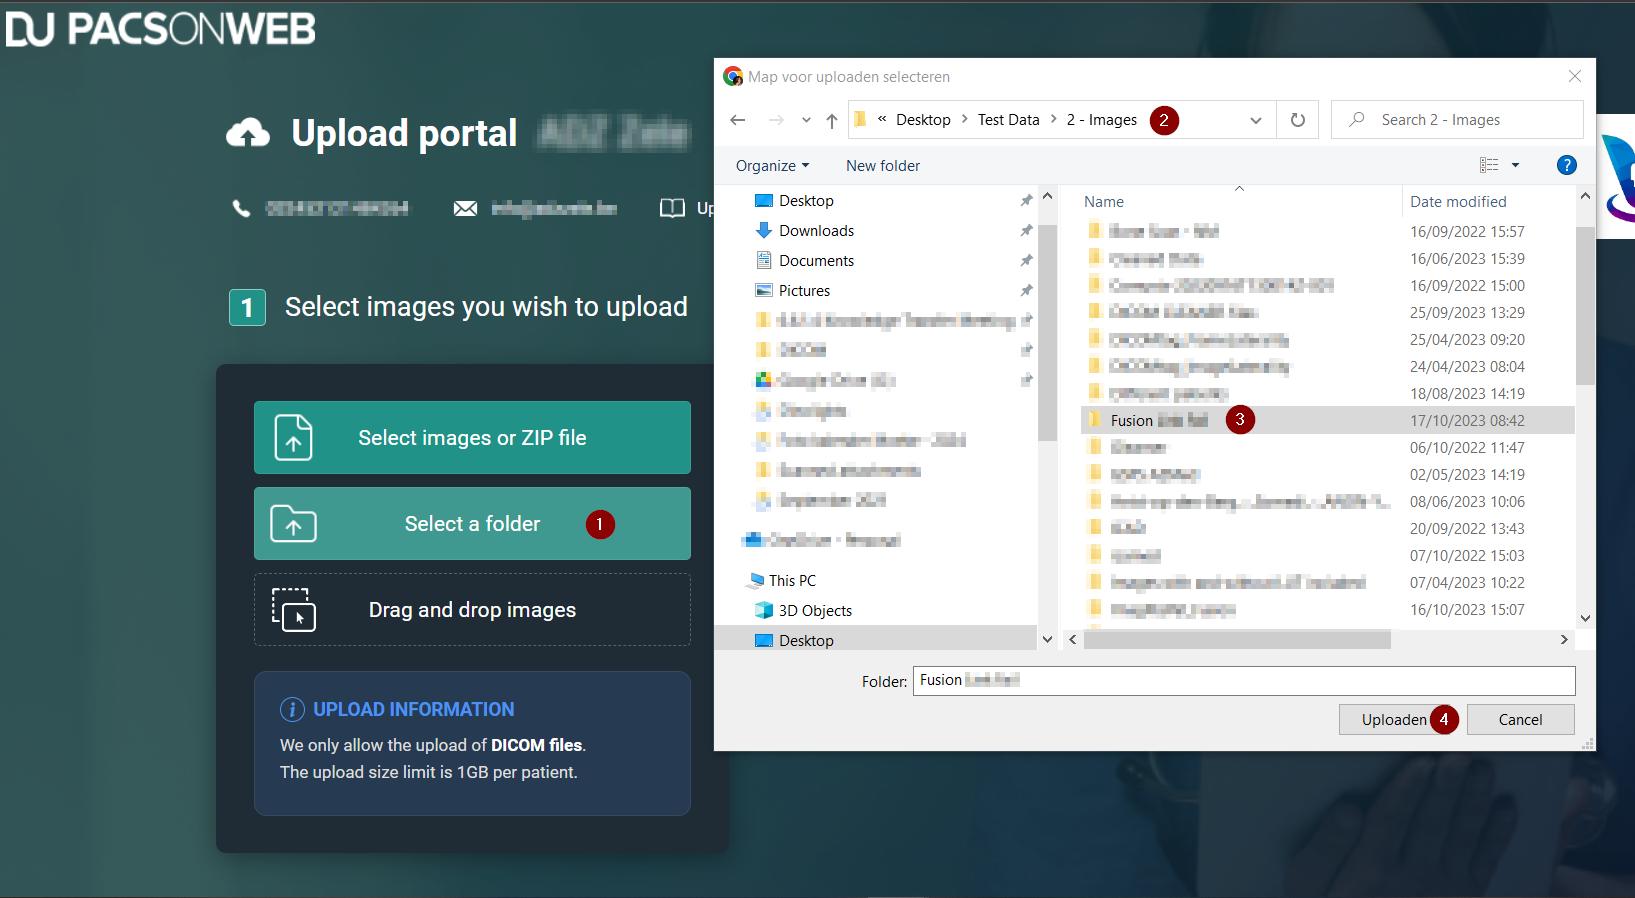
To select an entire folder or a CD/DVD to add to the Upload Portal:
1. Click the Select a folder button.
2. In the file manager, navigate to the folder or CD/DVD drive where your images/files are located.
3. Select the folder that contains your images
4. Click the Upload button in the file manager.
The images/files within the folder will be added to the upload portal. To complete the upload, verify the information and click Start upload.
| Tip: Your browser may display an additional pop-up message when you select a folder. If this happens, click on Upload again. |
Drag and drop images/files
You can drag & drop your images/files to add them to the Upload Portal.
| Note: The drag & drop feature is not a button. |
To select an entire folder or CD/DVD:
1. Open your file manager.
2. Navigate to the folder where your images are located and open the folder.
3. In the folder select all files.
4. Click and hold down the left mouse button.
a. While holding down the left mouse button, move your mouse to the upload portal and release the mouse button.
The images/files within the folder will be added to the upload portal. To complete the upload, verify the information and click Start upload.