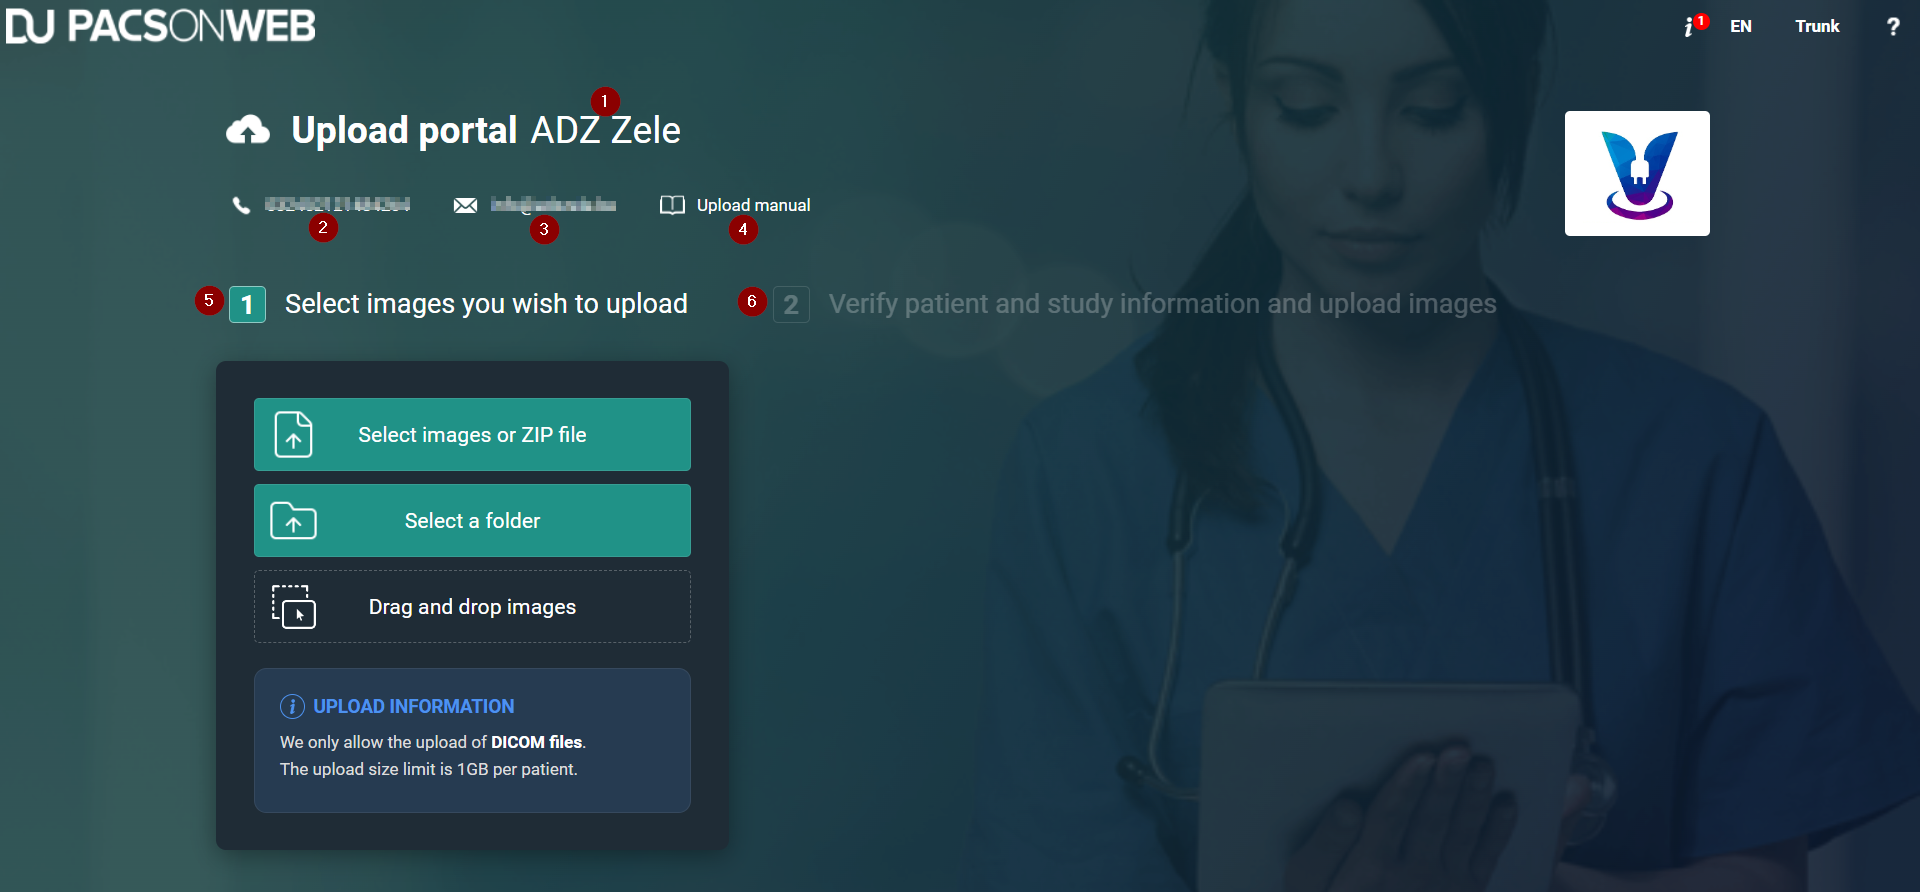
Upload Portal
The Upload Portal allows you to upload your medical images and related documents to your Hospital/Institution.
To successfully upload your medical images and related documents to the Hospital/Institution:
1. Add your medical images/files to the upload portal.
2. Verify that you added the correct images/files to the upload portal.
3. Agree to the privacy policy and consent to sharing your medical images and personal data with the hospital via the upload portal.
4. Click Start upload.
Overview of the Upload Portal page

Number | Designation | Description | ||
|---|---|---|---|---|
1 | Source | The Hospital/Institution from which you received the Upload code. | ||
2 | Phone number | The phone number of your Hospital/Institution. | ||
3 | E-mail address | The e-mail address of your Hospital/Institution. | ||
4 | Hyperlink | A link to the Upload Portal chapter of the user manual. | ||
5 | Panel 1 (Select the images/files you wish to upload) | Add your medical images and related documents to the Upload Portal using one of the 3 available options: • Select images, files or ZIP files • Select a folder • Drag and drop images/files The following file types are supported: • DICOM files • Non-DICOM files: pdf, png, jpg, jpeg, tif
| ||
6 | Panel 2 (Verify patient and study information and upload images/files) | Verify the patient and study information and upload the images/files.
|
